… or something like that. Let me just say first off, I’m not a great seamstress. In fact, I’m pretty awful. BUT sewing with leather actually seemed really easy. Who would have thought?
First of all, you need a pattern. I didn’t have one, so I made it up. Also a lot easier than anyone knew, anyone being me.
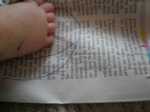
I drew around Harriet’s foot (and on it), then added a seam allowance.  I realised later that I was waaay too generous with it, as leather doesn’t fray and doesn’t need to be edged the way cotton would. That shape is the bottom of the shoe. The upper has the same shape at the toe, then flares into little wings. This could be as long as you want. It is rounded at the top where it meets the ankle. The ankle part is trickier. Basically I made a tube that was round enough to attach to the heel seam, go across the top of the foot and overlap slightly at the back for velcro-ing, then I cut the decorative top and the bridge of the upper into it. Also you need four little tabs for the tops of the boots. Here are my pattern shapes:

Before attaching the main pieces together, you need to do any decoration you intended. I was going to have some decorative stitching, but I forgot. I did, though, sew the tabs to the peaks of each ankle, and do two lines of stitching at the top in case the leather stretches.
The next part is where you sew the ankle to the upper. This is hard because you can’t pin it together. I sewed really slowly, piecing and turning the parts as I went. You need to get the curves to align so that the shoe has some shape. It will look lumpy when flat, but hold it up and it’ll look much better:

The next thing I did, but I think that this maybe isn’t necessary if you don’t like the look, was to elasticise the ankle, as Harriet kicks her shoes off all the time.
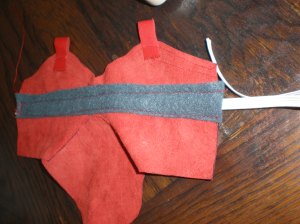
I sewed a felt casing on the inside of the ankle by sewing down one long side:

then securing some elastic at one end:

then sewing dwon the other long side, carefully avoiding the elastic hidden inside. It should look a bit like this:
Pull the elastic as tight as you think it needs to be, then secure and cut off the remainder.
Now you need to sew the top parts to the base. Tricky because my sewing machine moves quite fast, ,and again, no pinning. I tacked the pieces together in places:

then sewed the upper to the base:

Then all you need to to is turn it inside out, attach the velcro (cutting off the sharp edges):

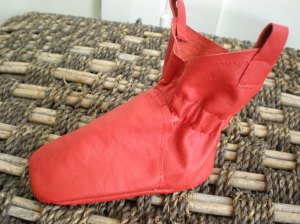
and voila… a boot. Maybe a little more Peter Pan than Buffalo Bill, but still, a boot!

